Monthly Archives: July 2013

JT65 – Easy as Pie!

Why waiting for the family to get ready, I figured I’d download JT65-HF and give it a try. The hardest part seemed to be finding the actual download. I was not able to download off Sourceforge as the link kept telling me the file wasn’t found. The ARRL has a link at http://www.arrl.org/hf-digital but it is for an older version. I eventually found the current version at http://jt65-hf.com/downloads/ .

You need to have accurate time and need a time check/sync program that is more frequent than one built into Windows. I would suggest the free NetTime program at http://www.timesynctool.com/ which installs as a Windows service.

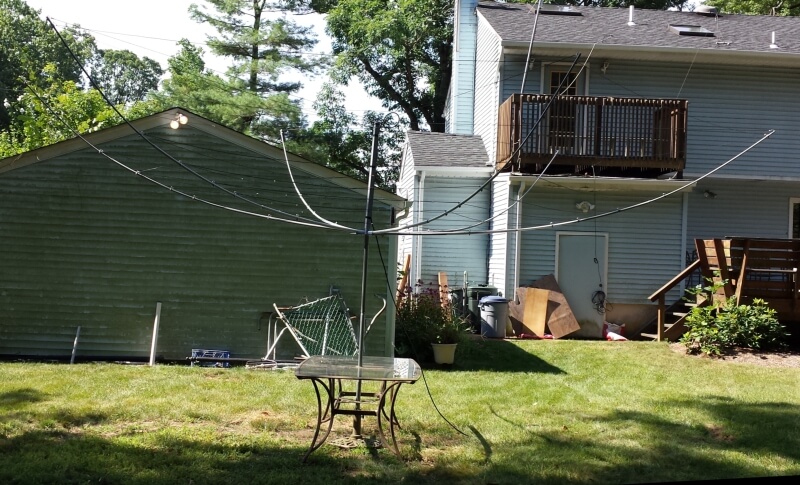
Installation and configuration was very straightforward for me. Configuration involved just specifying my call, grid square, soundcard input.output and PTT port. I have a SignaLink USB and just needed to select the SignaLink in the drop-downs for input and output devices. I did reduce the audio gain on the main screen until the signals were the only noticeable output on the waterfall. I watched a couple quick YouTube videos to get the idea and I was off and running.

Using JT65-HF is essentially point-and-click. A JT65 cycle occurs as follows:
1) On the top of each minute 47 second transmission occur.
2) There is a pause for 13 seconds which allows everyone to select their next action
3) #1 repeats

A typical QSO is a station sends CQ and at 47 secs after each minute you can see what stations are calling. You double click on their CQ in the list before it hits the top of the minute and the program sends your call back to them for 47 seconds. Your radio is transmitting for the full 47 seconds. Assuming the CQing station picks up your call, he has ~13 seconds to initiate the action which QSLs it from his end. You have 13 seconds to see it and either double click the acknowledgement or click on Send Report. The next 47 seconds your radio is in transmit sending the report. The CQing station then sends 73 and you send 73.

Here’s a screen shot of an exchange (click to enlarge):

jt65-hf


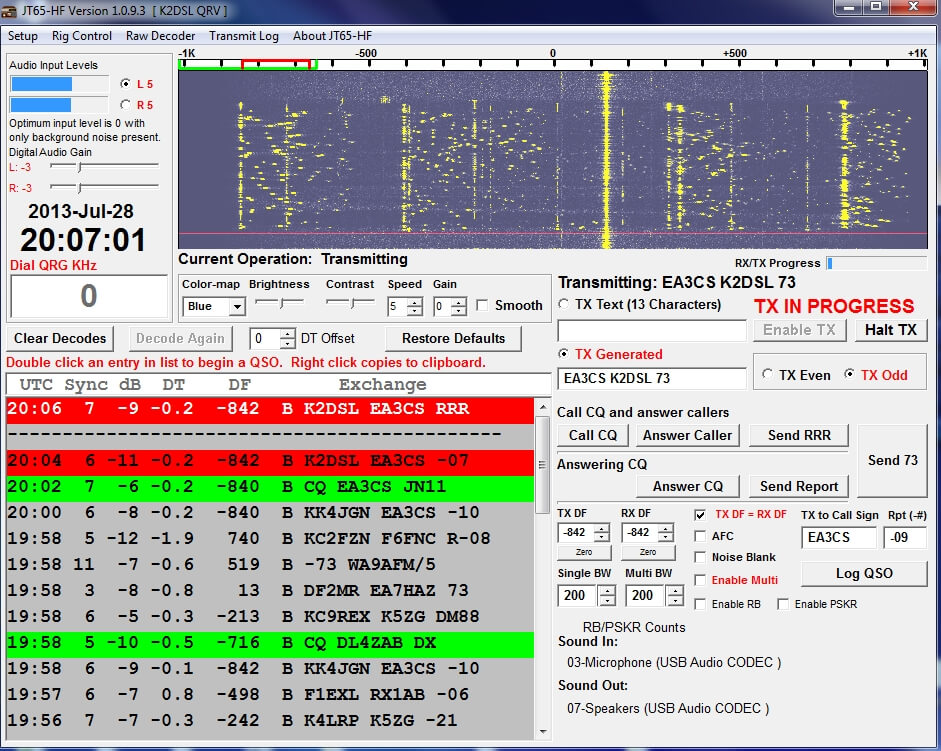
1) EA3CS called CQ (green highlighted line) at 20:01z and I decode it at 20:02z
2) I double clicked that line which captured his call and grid square and told JT65-HF to send my call and grid square
3) EA3CS acknowledged and sent my signal report (red line) which I receive at 20:04z
4) I double clicked his response which captured my report and told JT65-HF to send EA3CS his report
5) EA3CS replied back confirming with RRR (red line) at 20:06z
6) I double clicked his QSL and it sent him back EA3CS K2DSL 73

You can see from the times that I saw his CQ @ 20:02 and finished sending my 73 as the last exchange which completed at 20:08. So it’s a 6 minute QSO. Not fast but interesting. It required no typing and just double clicking. You want to remember to re-enable the Enable Multi option or you will just continue to decode the offset for the QSO you just had vs the bandwidth for the waterfall. The program has a built in log which can generate an ADIF file of contacts you can import into your favorite logging program.

73,
K2DSL

NA4RR Hex Beam Installed and On the Air!


ordered the NA4RR Hex Beam last weekend and it arrived a few days later in 2 boxes via FedEx. Here’s a picture of the boxes as they arrived. The taller box contained the main center post and the 6 fiberglass arms, each arm made up of 3 segments that fit into each other.  The smaller square box on the chair contained all the other components – instructions, main hub, bolts/nuts, pre-cut wires for each band and the bungee cords.

na4rr_boxes

Here’s a picture of the box with just the instructions removed. On the left in the ziploc bag is the ferrite balun I ordered along with the antenna. The coated wires for each band were wrapped neatly and individually labeled. The bolts to secure the center hub to the main post and the pole, along with lock washers and bolts were packaged in a small envelope you can see looking into the center of the main hub. Just looking at the components in the box (click the picture for a larger view), you can tell everything was well organized and meticulously packed.

na4rr_main_parts


I’m lucky to have a friend like Rob (KC2RDW) who came over this morning with some tools, spare parts and an antenna analyzer. Rob has previously built his own hex beam so he’s very experienced in it’s construction and has helped others put hex beams together.  Rob mad a great suggestion that we use the patio table with the umbrella removed as a way to get things setup as it allows you to move around and under the antenna as needed. We started with the hub placed on a spare metal pole. The hub has each of the tubes that accept the fiberglass poles numbered so it is easy to align the components and keep everything straight. Using the supplied bolt we attached the main center pole to the hub with the coax connector at the back. Once that’s in place we unwrapped the 3 parts of each fiberglass pole that were shipped grouped together. Each is marked so they go into the center hub and into each other properly. It took 15 minutes to attach the center post and slide the 3 parts for each pole together and in their respective slots. Here you can see a close-up of the marked center hub with one of the fiberglass poles:

hub_marked


The next step is to take 6 of the bungee cords and place the S hook on one end into the end of each fiberglass pole and the other end onto the eye bolt at the top of the center post. This step gives the hex beam it’s familiar inverted umbrella shape. There are 2 other bungee cords that attach between the fiberglass poles on the front of the beam to keep things in place. This takes 5 minutes and it is helpful to have 2 people for this with one bending the end of the pole up as the bungee cord is attached to the center post.

The next step is to take each of the wires and secure it to the center post and route them through the rings on each pole until you come all the way back to secure the other end to the center post.  You start with 6m which is the shortest wire and closest to the center pole and go out from there. As previously mentioned, the wire for each band is neatly wrapped and labeled so there’s no guesswork. Here’s a picture of one of the center hubs with 2 bands attached and a picture of the loops on each of the poles that the wire passes through:

center_post_connection
pole_loops

Once looped through all 6 poles, the connector at the other end is attached to the opposite side of the center post completing the wiring of each band.  This process which entails unwrapping the wires for each band, looping them through and bolting each end takes about 30 minutes. It is helpful to have two people doing it to pass the wire for each band through the loops.

With all 6 bands wired up and connected, the last step in the setup is to attach the coax. I’m reusing the coax from my tri-band fan dipole that was torn apart last October when a 70 ft tree fell across my yard during Superstorm Sandy. We ran the coax through the hole in the hub and placed the rubber grommet around it. Rob placed a loop at the top of the coax and attached to the connector on the back of the center post. A little electrical tape to hold the coax in place and the antenna is complete! It’s now about 90 mins after Rob arrived which included looking at where I wanted to put the antenna, moving the patio table into place, and getting the pole in place before we even started. We don’t have a rotor on it yet so Rob just points the NA4RR hex beam ENE.

The antenna is only 6 feet off the ground but we head inside to check things out. We hook up the coax to TS-2000, power everything up and check out how things look. Well, it looks FANTASTIC! From 6m to 20m, as we tune the bands the SWR is between 1:1 and 1:1.5 and we’re hearing signals. What I immediately notice is that on an empty frequency my S meter which was never lower than S3 and more like S5 is showing nothing. If I wasn’t hearing others and seeing the S meter move when someone was on frequency I would have thought that nothing was plugged in.  The first contact we make is with a PI4 station in the Netherlands and everything seems to be working well. Rob checks each band with his nice RigExpert antenna analyzer and things look good.  I’m now back on the air after about 9 month hiatus.

Rob and I talked about where I was going to more permanently mount it and what I need to get. Once I have all that in place we can get the rotor on the pole and the antenna on the rotor. I’d expect the bottom of the hex beam hub to be about 18-20 feet off the ground once everything is in place.  Here’s a picture of the completed antenna in the middle of the back yard supported by the patio table at 6ft off the ground. Click for a larger view.

completed_na4rr_hexbeam

I’ve made 7 contacts to EU stations and a 6m contact to a strong Alabama station and everything appears to be working well. The NA4RR hex beam is a terrific value for a well constructed plug-and-play hex beam. With everything pre-cut and well labeled, it’s ready to go with detailed instructions that make assembly foolproof.

I’ll post some more pictures once the antenna is up higher with the rotor attached. Thanks again to Rob KC2RDW for all his advice and help both pre and post purchase! It’s great to have the headset on again and be back on the air!

73,
K2DSL

New NA4RR HexBeam Antenna Ordered

I have been off the air since Superstorm Sandy brought a 70 ft tree down across my wire antennas. With spending all free time since then dealing with the aftermath of the storm, being extremely busy at work and then my younger daughter’s high school graduation party for her entire class, I just didn’t put in the effort to get any antenna back up. I even missed Field Day for the 2nd year in a row as it took place on my daughter’s graduation weekend.

This morning I ordered NA4RR’s hexbeam antenna! NA4RR’s design is based on G3TXQ’s design as other similar hexbeam products are. I investigated other comparable models from DX Engineering, Traffie and K4KIO. I decided on the NA4RR since the design was similar, the online reports/reviews were all excellent, and the price was the lowest. Everything is pre-cut and assembly time is reported around 1 hour. I’ll be relying on some help from my local club friends, a few which have hexbeams, to assemble the antenna and get it in the air once it arrives and we can all find the time.


Soon!!!
K2DSL